P8S - Hephaistos
Encounter Info
DPS Check
Part I: 59.8k
Part II: 64.8k
Enrage
Part I: 7:52
Part II: 8:26
Drops
| Chest One | Chest Two |
|---|---|
| 1 coffer randomly selected from the following | 2 unique coffers randomly selected from the following |
Strategy Reference
PART I
Illusory Creation/Manifold Flames
 OR
OR
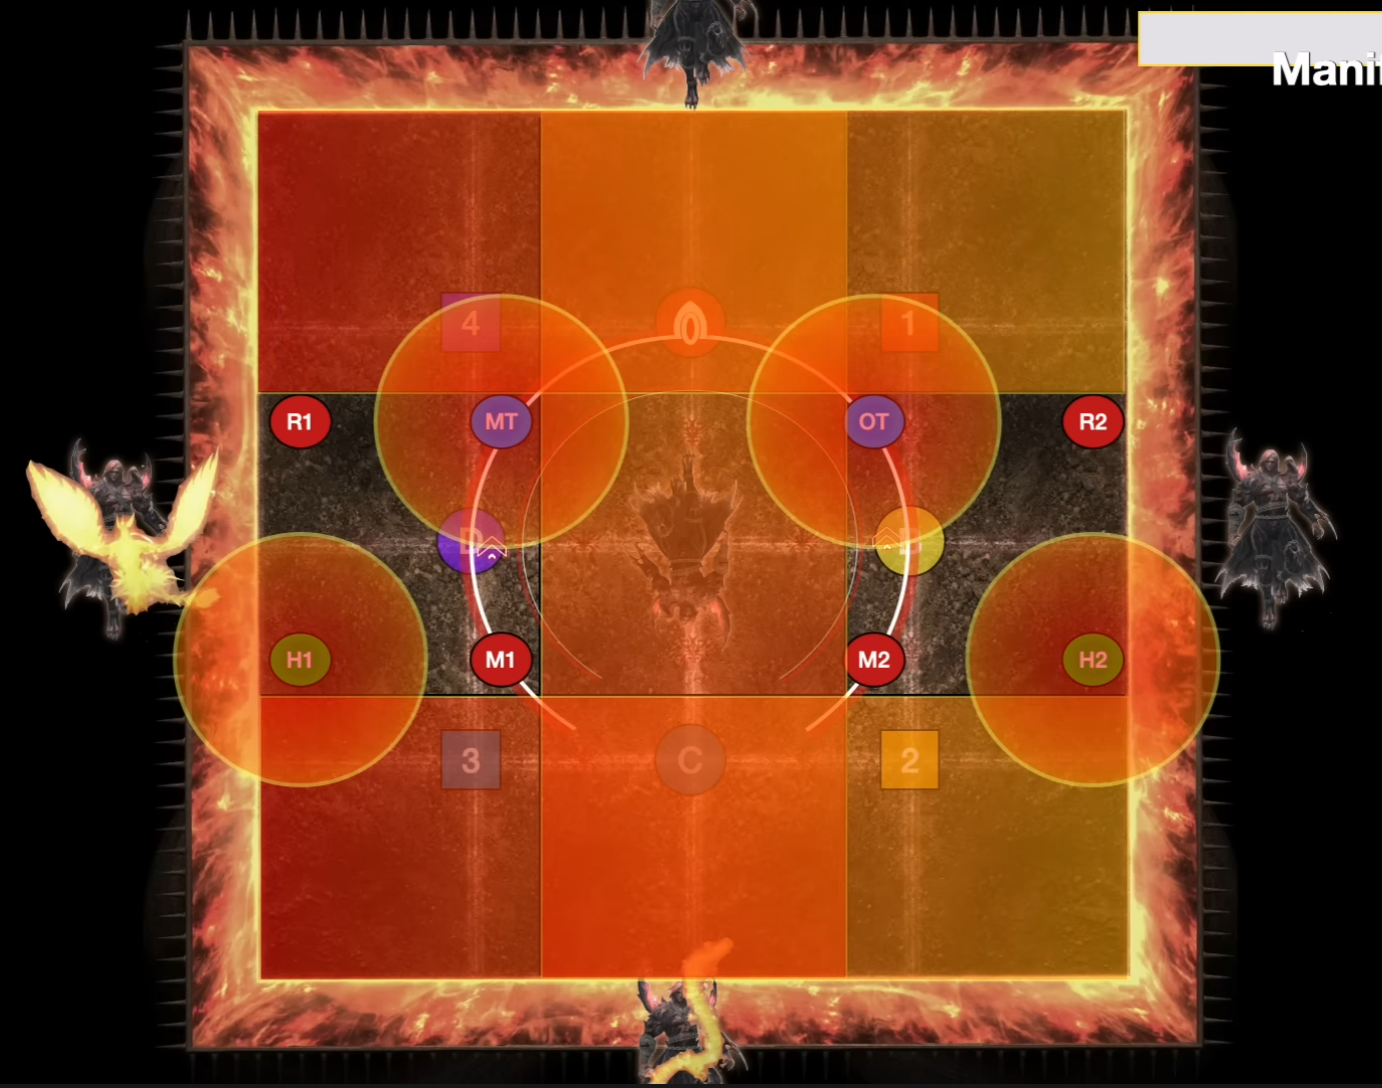
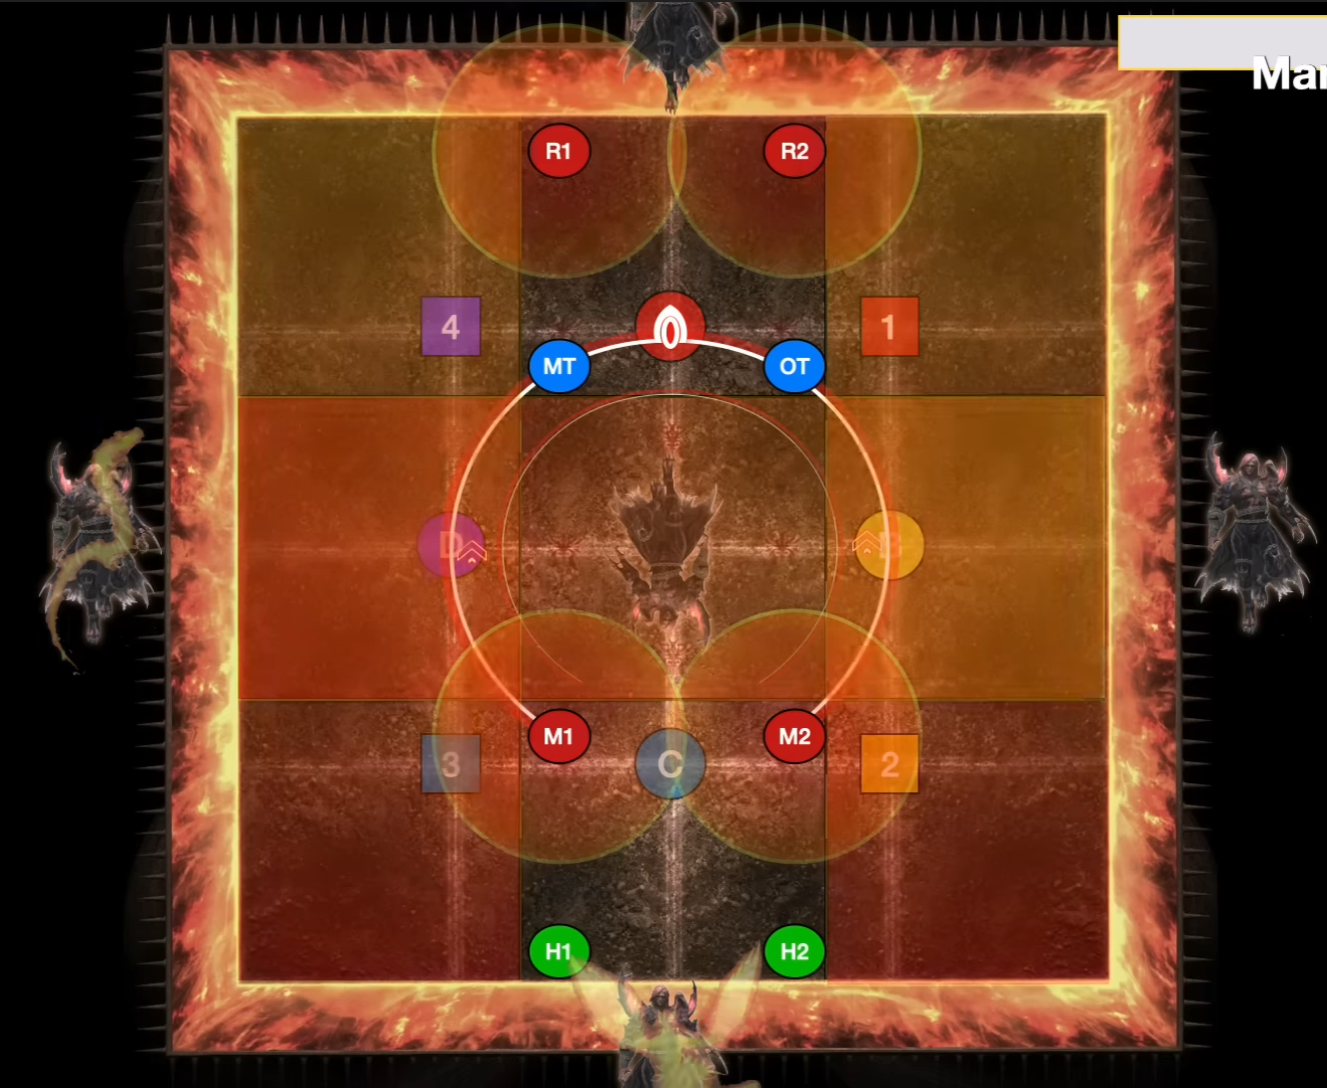
Two possible patterns for this, priority is based on your corner partners (so, if your corner is NW, you would go either north or west). Spread with Tank/Melee in, Ranged/Healers out for uptime.
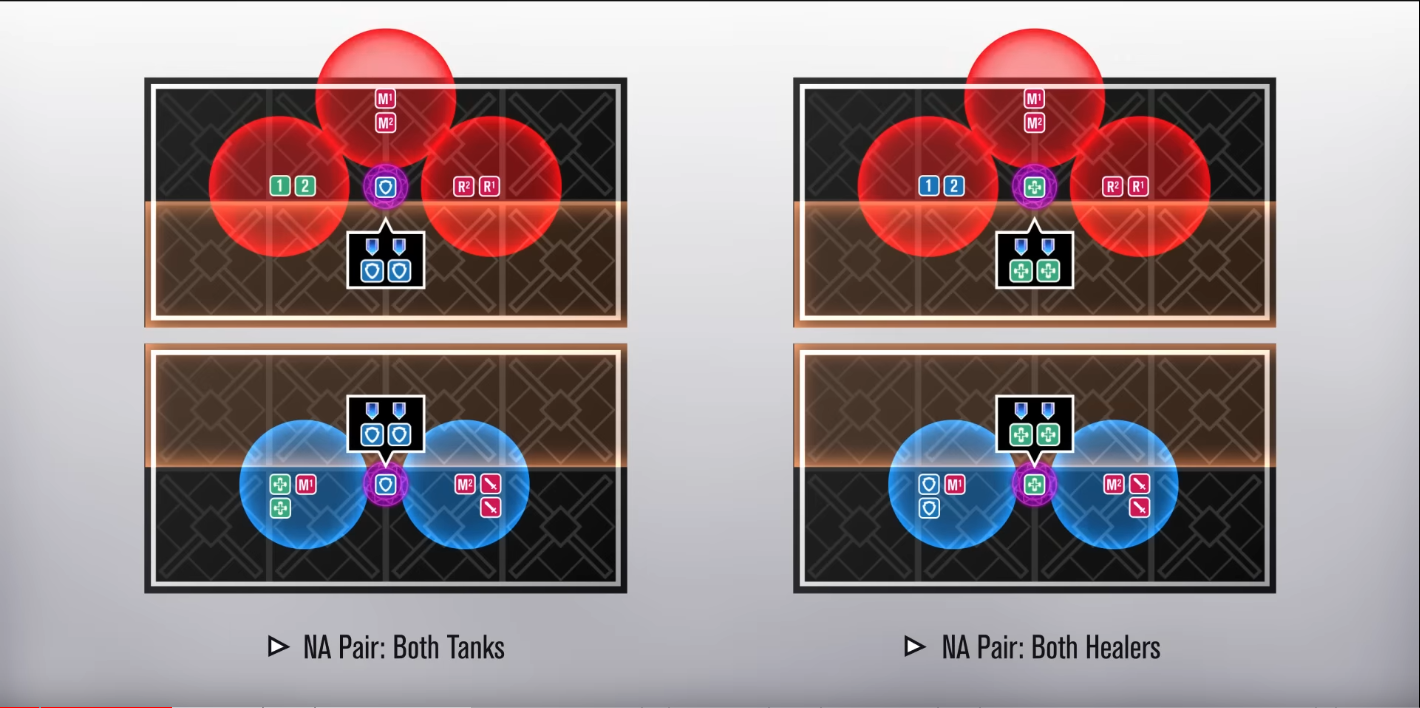
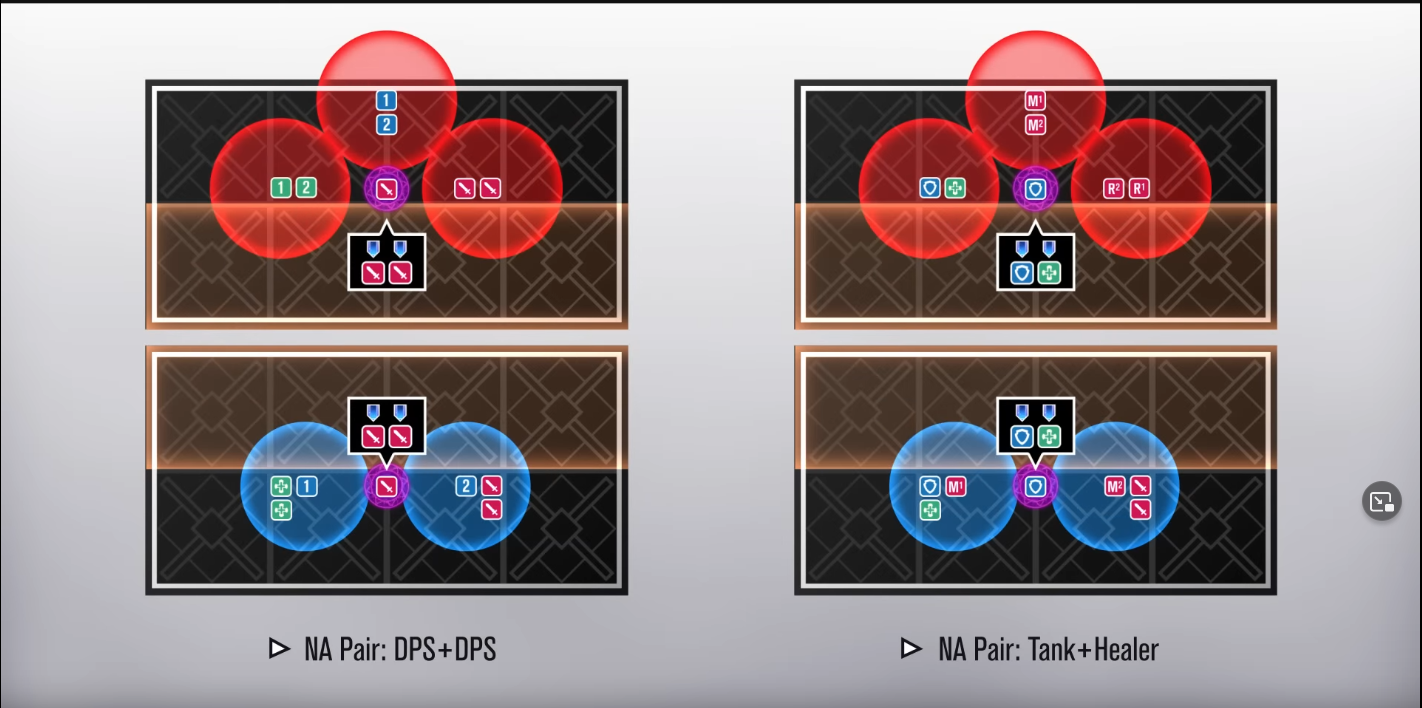
Manifold Flames will target either all DPS or all T/H with a point-blank AoE - whichever group gets hit should stack outside the hitbox on the nearest cardinal, and the opposite role should spread inside the hitbox on their intercard corners to bait line AoEs. Getting hit by the first will give a debuff, to simplify seeing who needs to bait.
Uptime strat
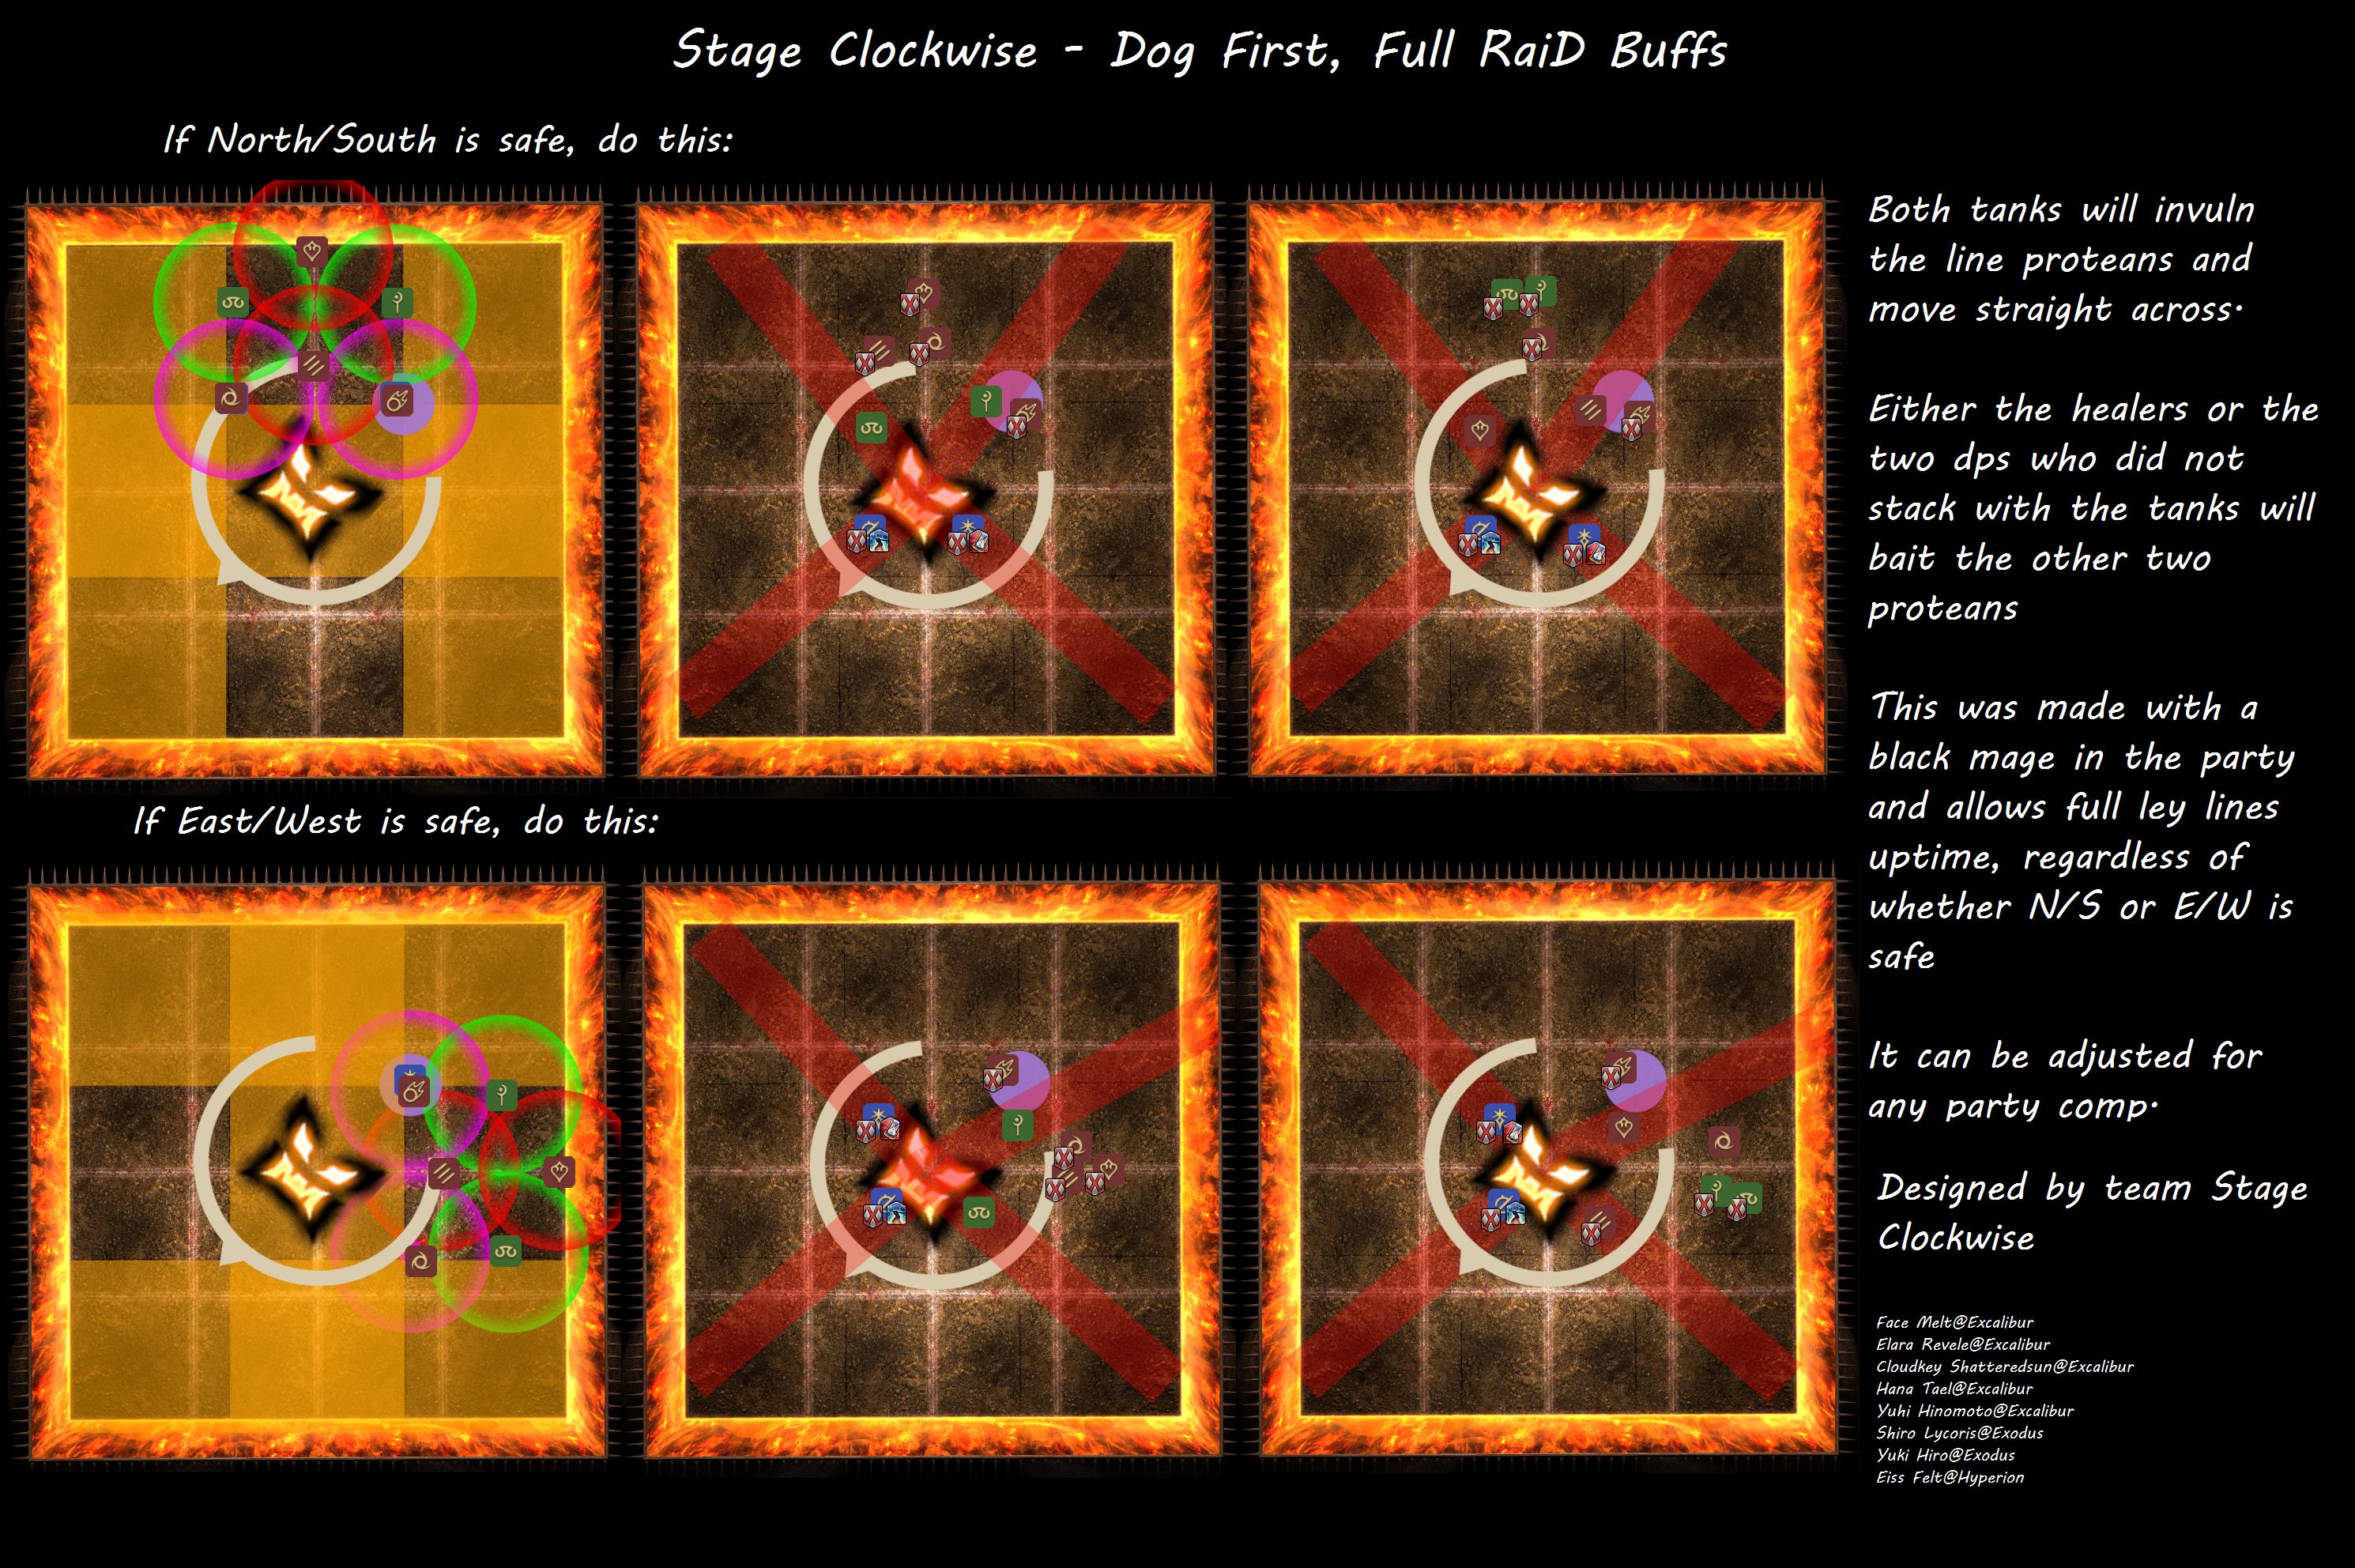
Fourfold Flames
Bread Heads Raidplan
Azem’s Thighs Save Lives Raidplan
Centaur 2
Bread Heads Raidplan
Azem’s Thighs Save Lives Raidplan
Snake 2
Bread Heads Raidplan
Azem’s Thighs Save Lives Raidplan
PART II
Natural Alignment 1
Stack First
Fire/Ice options
High Concept 1
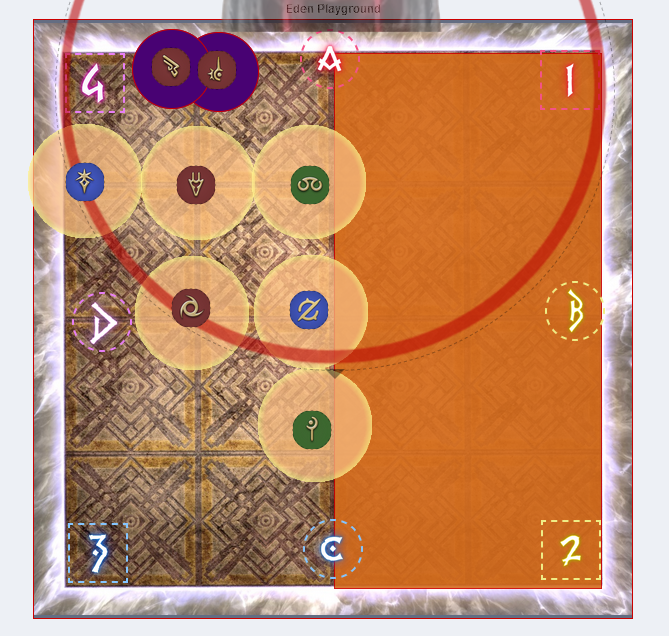
First Debuffs
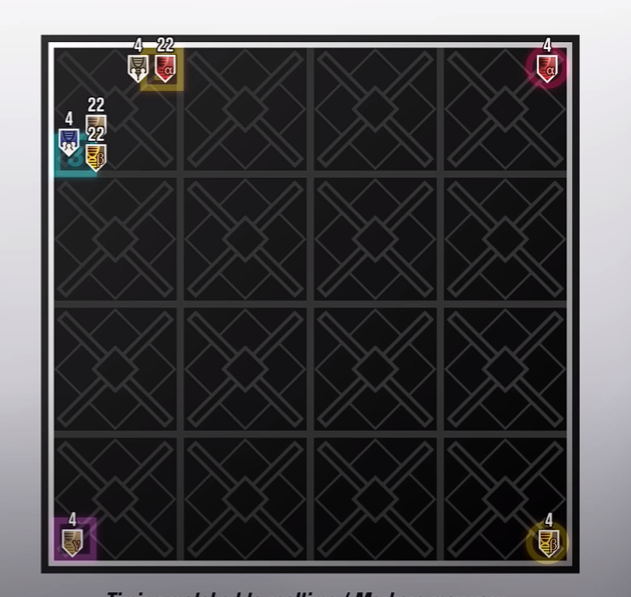
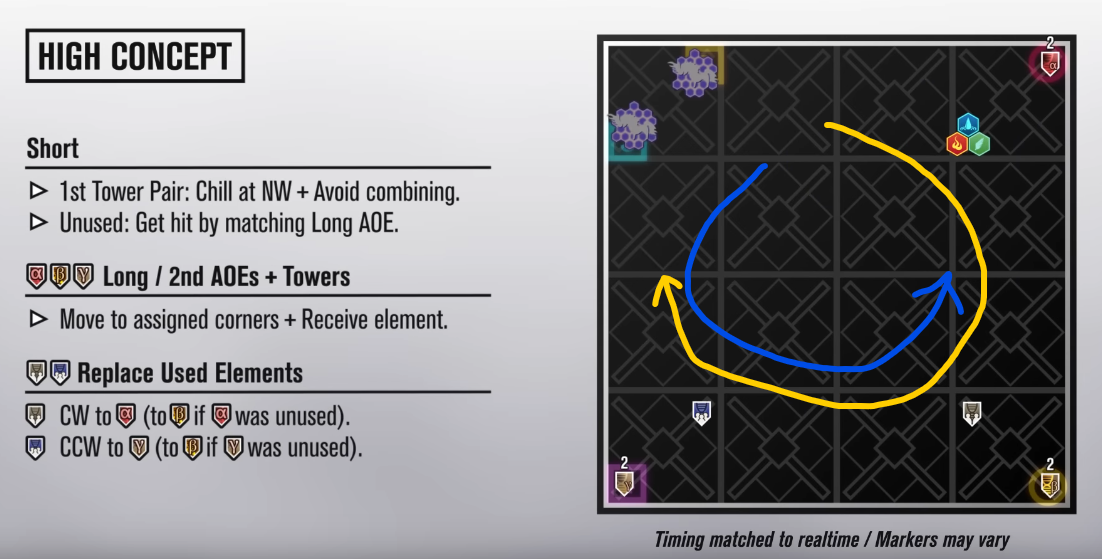
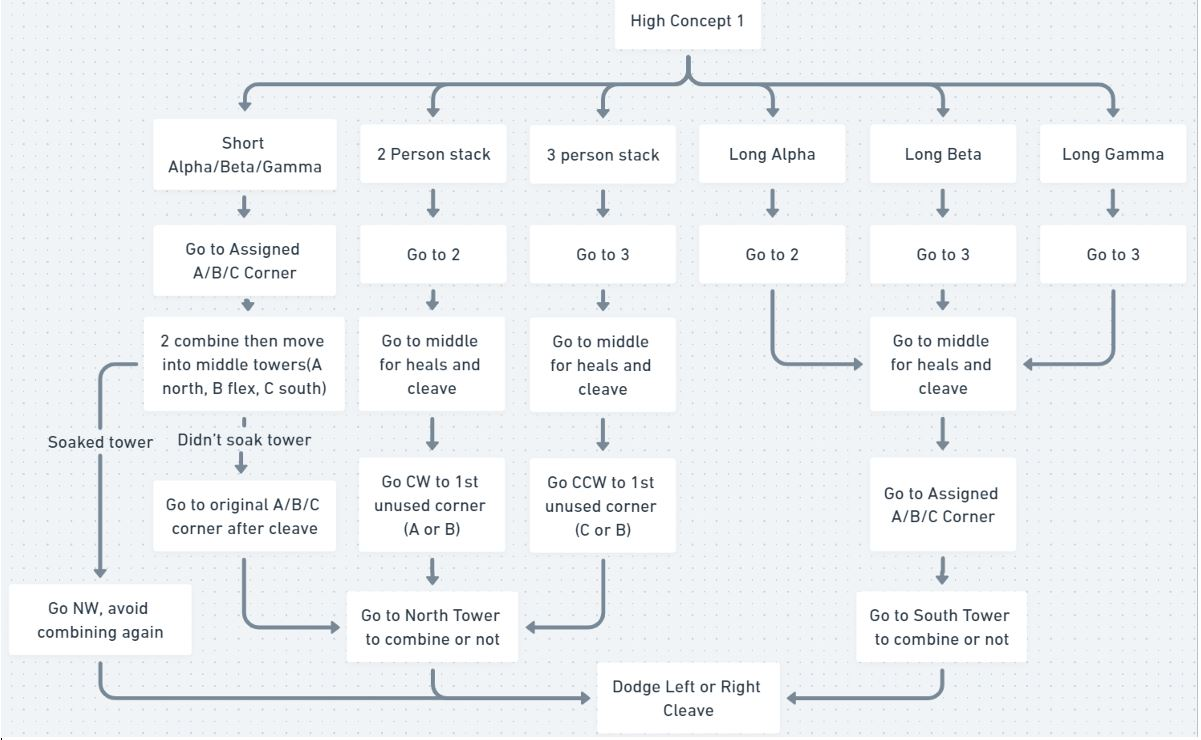
Short timer α, β, and γ debuffs go to markers A, B, and C respectively. The players with the stack markers will stack the 2-person stack on 2 and the 3-person stack on 3. Long timer α, β, and γ debuffs will stack with them, with α stacking with 2, and β and γ stacking with 3.
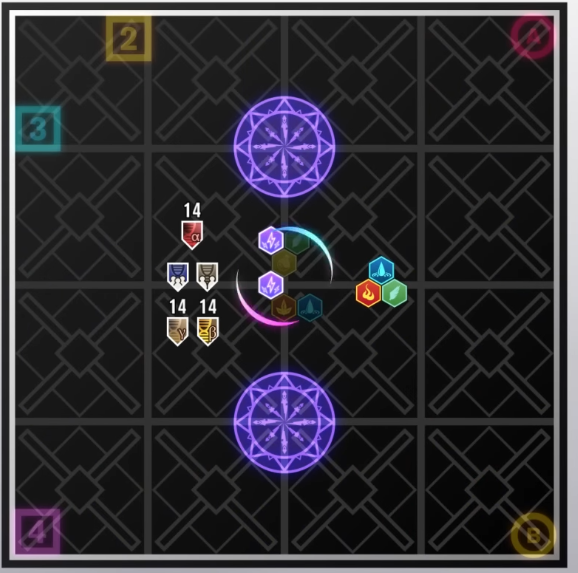
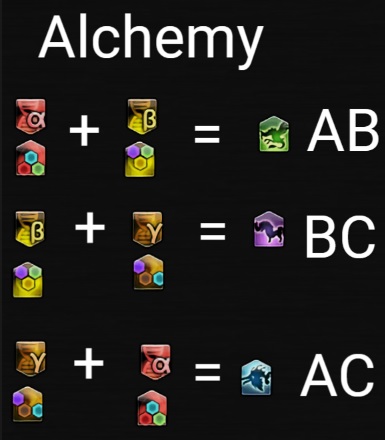
After this resolves, everyone will head towards middle for healing, and 2 of the short debuffs will combine to create a concept matching the tower color, as per the alchemy diagram. Concept players stand in the towers to resolve them, and all players make sure to stay on the side of the arena not being cleaved by the boss. The towers and the cleave will resolve at the same time, so this can be used as a timer - make sure you’re relatively close to your next spots while waiting for this to resolve as the next half happens very shortly after.
Second Debuffs
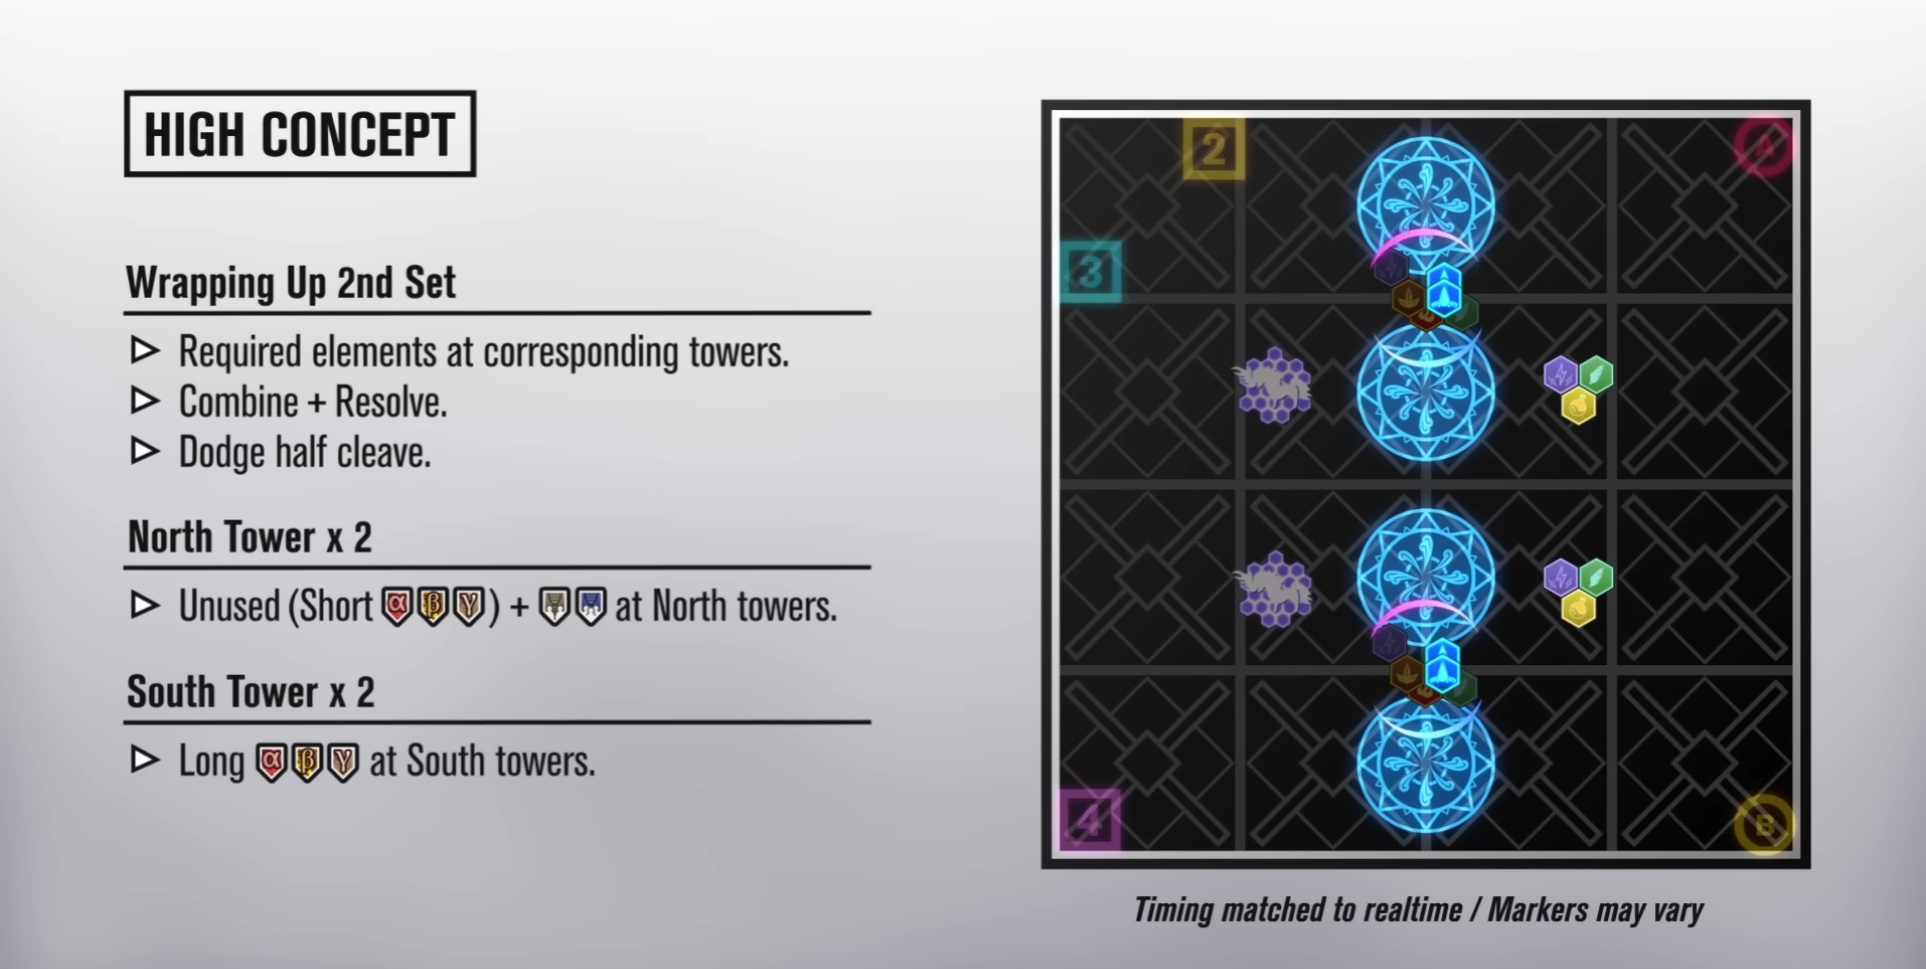
After the towers are resolved, concept players will head NW to sit in the free corner. Long debuff players will now go to their marker assignments, same as the first set. The short debuff player whose element was unused will return to their marker and get hit by the second element explosion, while the 2 stack heads for the first open corner moving clockwise from 2, and the 3 stack heads for the first open corner moving counterclockwise from 3. This should resolve with a total of 6 players receiving element debuffs.
There will now be 4 towers to resolve. Players with an element matching the towers will combine, with the long debuff players heading to the South towers, and the unused/2 stack/3 stack players heading to the North towers. If your element doesn’t match, just hang out on the safe side of the arena away from each other.
Flowchart
Raidplan
Natural Alignment 2
Raidplan
For this, stack/spread are resolved in the front 2 lanes (whichever is safe, swapping after) much like the fire/ice phase of NA1. Spread spots are static as listed in the raidplan. Fire/ice are resolved exactly as in NA1.
The main thing to look out for is Inverse Magicks - one player will have their mechanics resolve opposite of what the filled bars are showing (i.e., if the player that has the Inverse Magicks debuff has their stack bar fill first, the pattern will be spread first, stack second).
High Concept 2
Joonbob Mini-guide
Overall, HC2 looks much more complicated than it actually is.
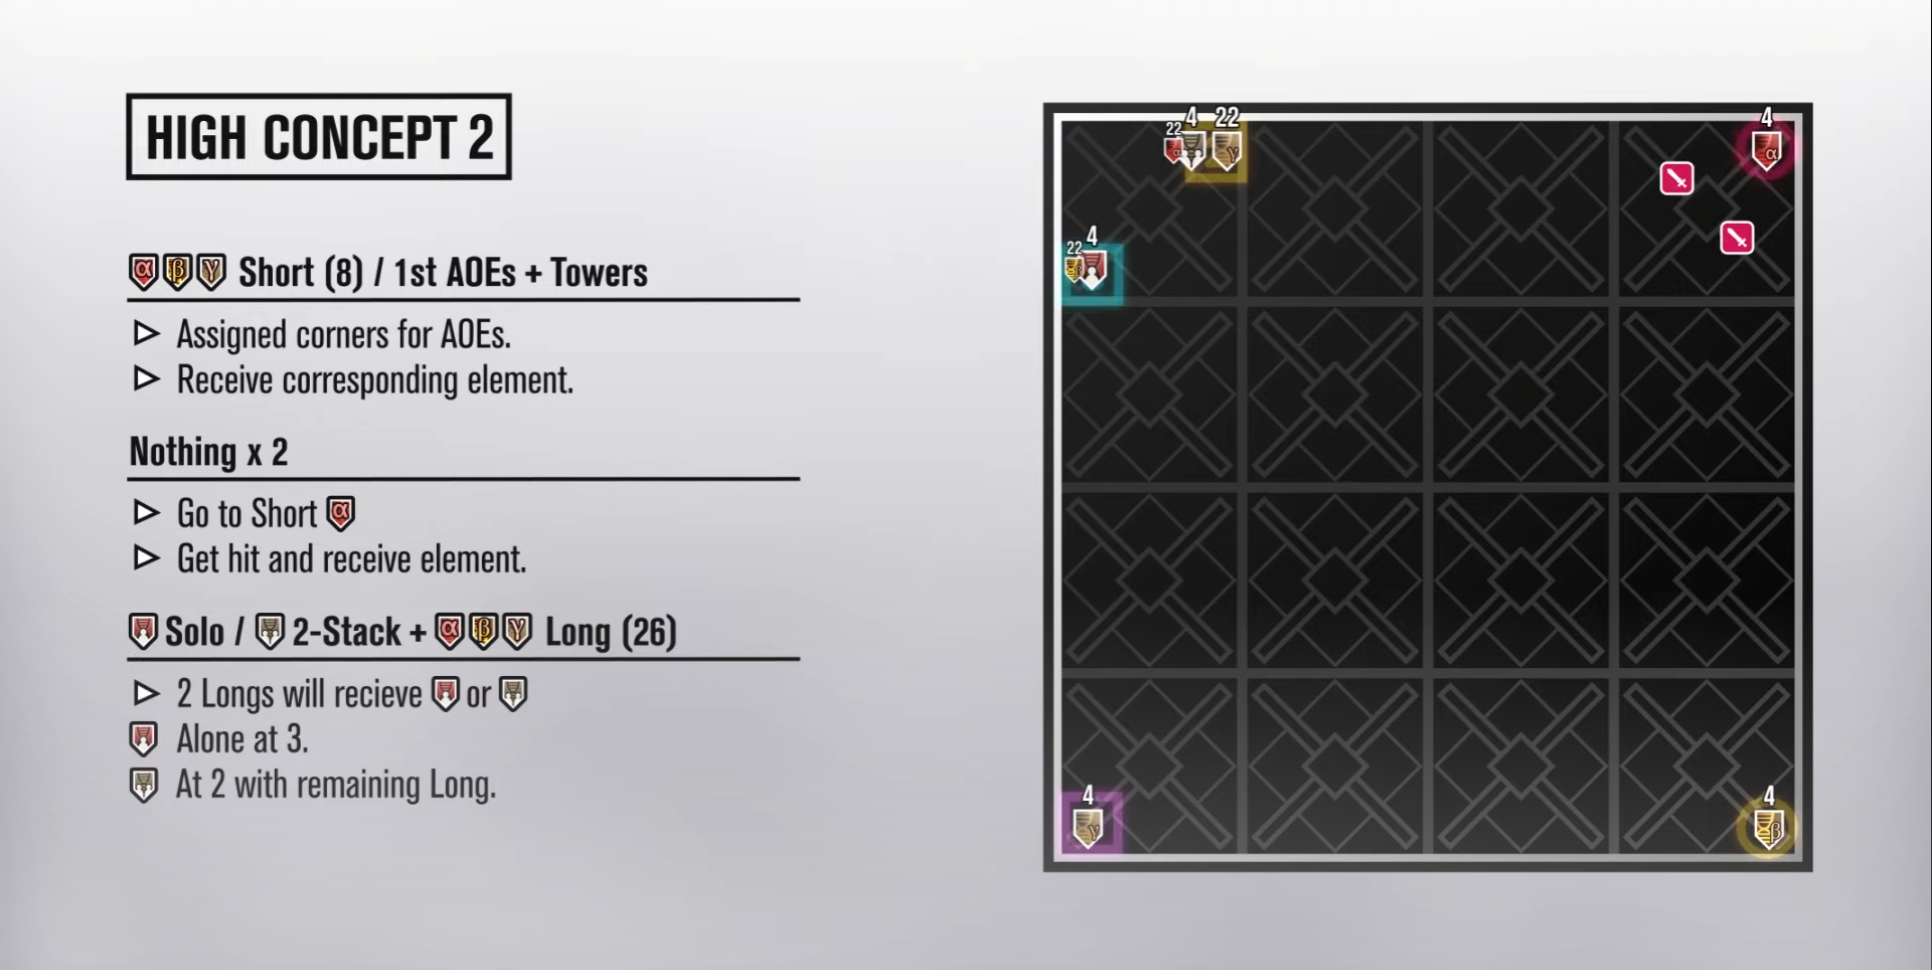
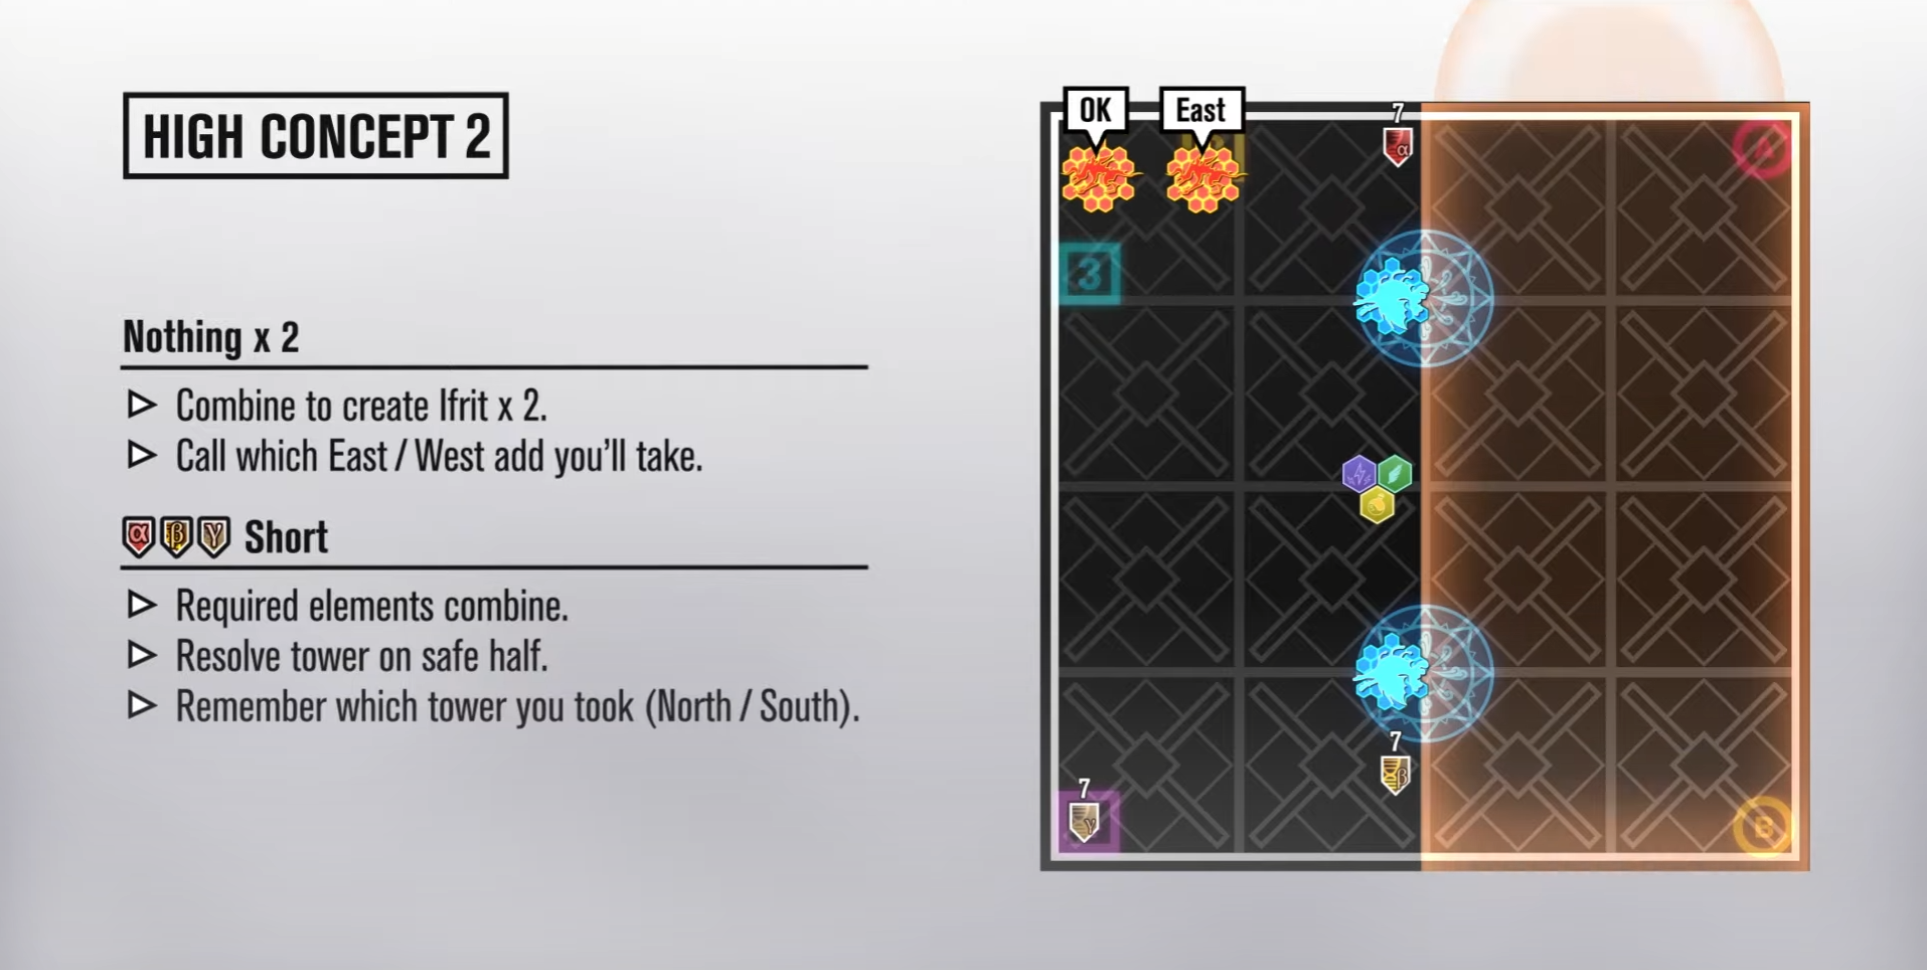
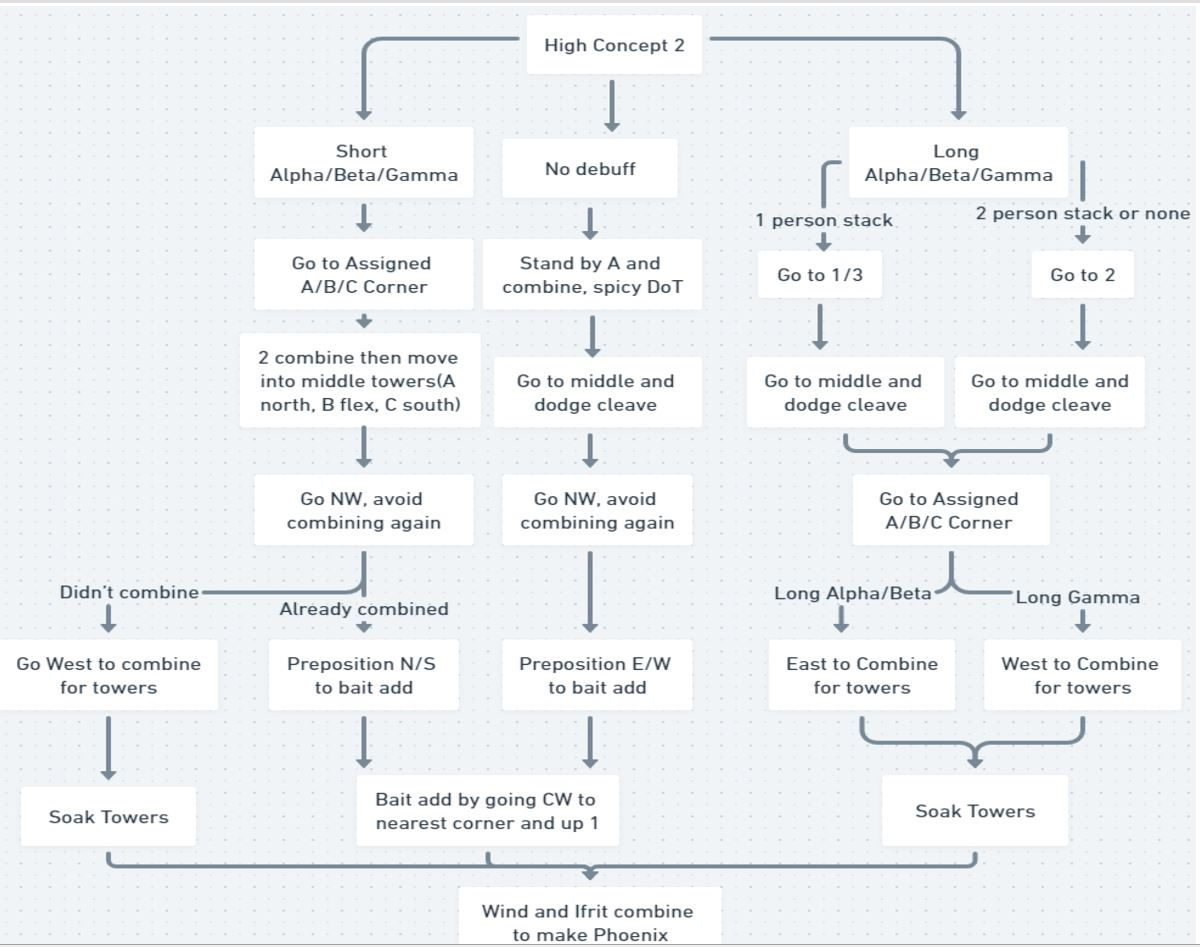
For initial positions, you will match your debuff much like HC1. If you have short α, β, or γ, go to your corresponding A, B, or C marker. If you have a 2 person stack OR a long α, β, or γ, go to the 2 market. If you have a 1 person stack, go to the 3 marker. And finally, if you have no debuffs at all, go to the A marker and plan to get hit and then combine to make 2 Ifrit concepts. These will apply a SPICY DoT, so make sure to hang out near the center afterwards as much as you can to receive healing.
Next, towers. These resolve just as the first set in HC1, simply combine if your colors match the tower colors and go soak them. Remember which tower N/S you took. Everyone else hang out lightly spread on the safe half.
For the second debuff set, long α, β, and γ will again match their A, B, C markers. Everyone else will chill NW to avoid getting hit.
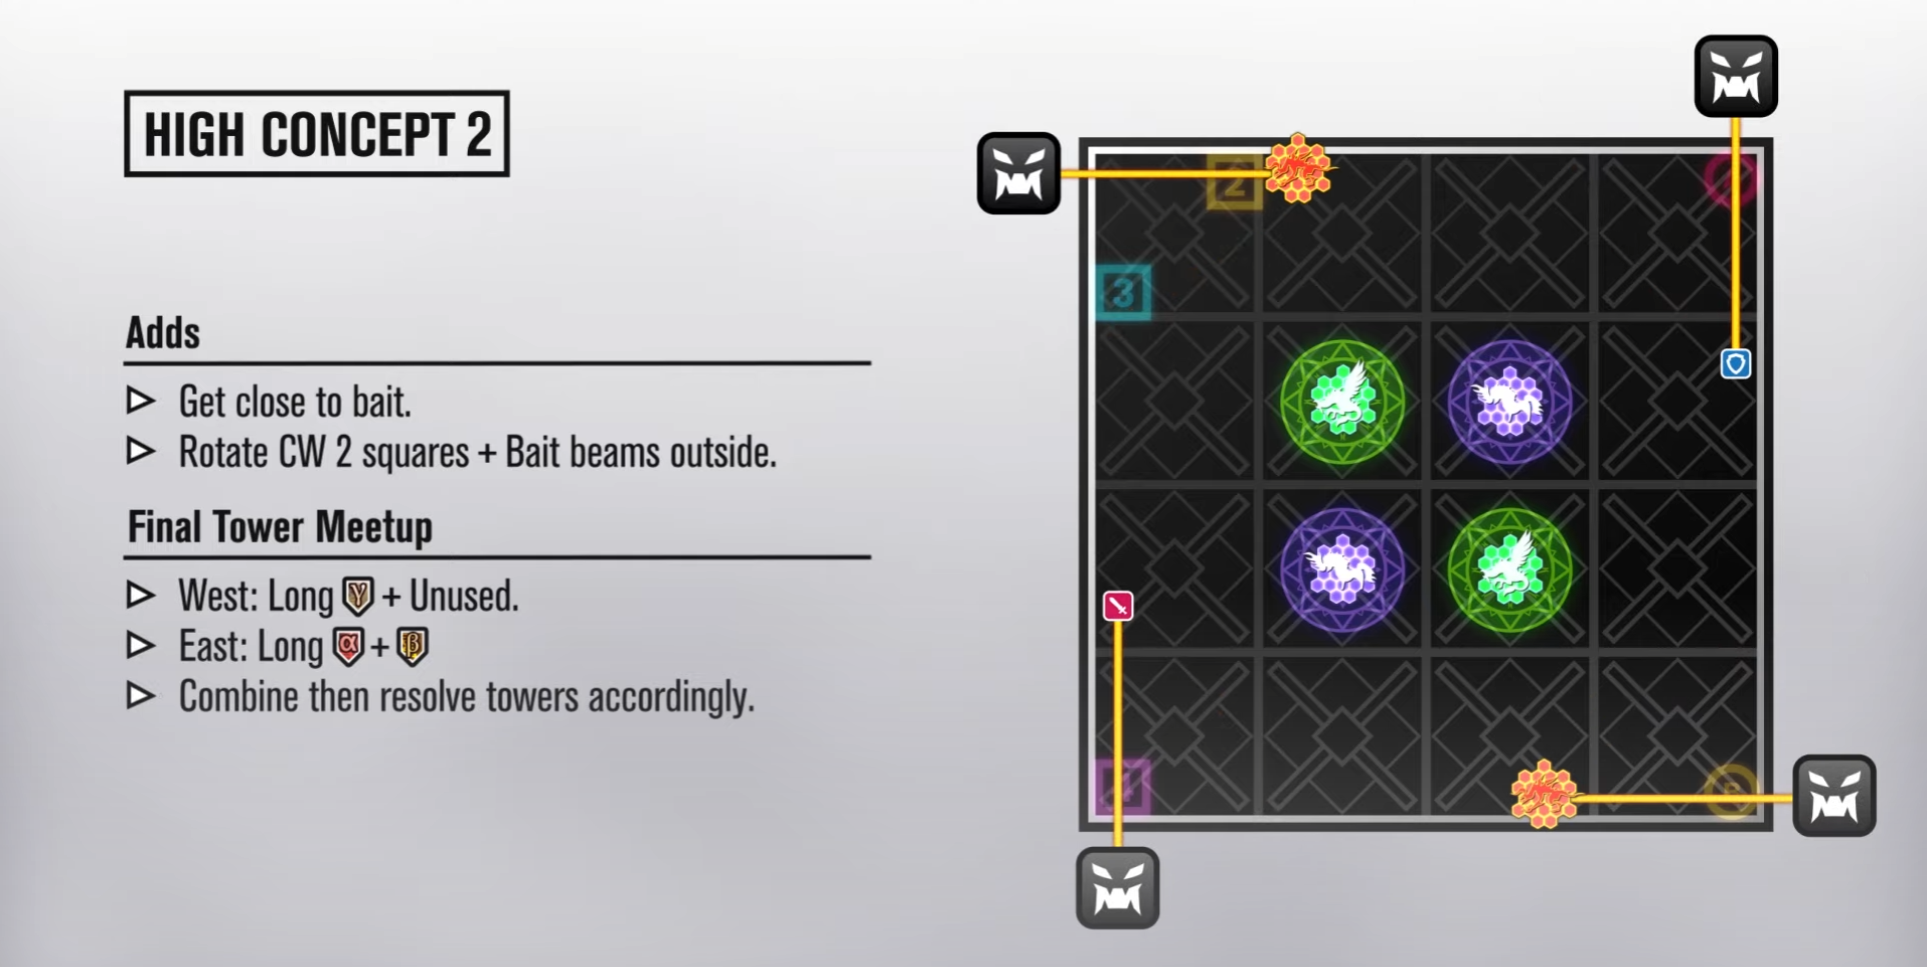
Long debuffs and the unused element set will collapse to combine - the collapse is simple, you combine A+B and C+unused, so you stay on the half of the arena you’re always on. After combining, soak towers that match.
While these players are combining, the players that soaked first towers will bait the adds North/South corresponding to which tower they soaked, and the Ifrit players will bait East/West (no priority, just call it out). Once the tether appears, move 2 squares clockwise and 1 square forward to ensure the resulting beams from the adds will leave the center towers clear. This is unavoidable damage, don’t try to dodge after baiting.
If you’ve done everything correctly, congrats! The remaining 2 ifrit players will need to combine with the remaining 2 wind (green) players to create phoenix feathers. Healers will need to ensure the party is at 100% HP before the final phoenix buff applies, or you will wipe. Once this is resolved, you will be reborn after Ego Death and continue into the victory lap with a massive DPS buff.
Dominion
Raidplan
Spread as outlined in raidplan - 4 players will get hit by an AoE that leaves a debuff. If you DO get hit, chill mid, while the players that didn’t get hit chase moving towers to soak them. The priority from left to right is Tank 1, Tank 2, Healer 1, Healer 2, Melee 1, Melee 2, Range 1, Range 2. So, for example, if the baiting players were Tank 1, Healer 2, Range 1, Range 2, they would bait left to right in that order. After the first towers are soaked, the players that got hit first will bait the second set.